Single sign-on with Azure AD in PHP
So, what’s this massive post about? I recently read an article on the Azure website about using Azure AD authentication with bespoke PHP applications. While the article is quick and concise – it has a number of serious issues.
First and foremost, the end result is that the solution just doesn’t work. It obviously took the writer a good amount of time to write the code for the article (assuming he did that is) but despite that, it has suffered from bit rot and a lot of people have tried and failed to use the article as a learning tool.
I’d still suggest using the article as reference material – everything has its value at the end of the day but if you do actually want custom PHP applications with Azure AD authentication to work, that article won’t give you a working solution. I’ve re-written the article and explained a few more of the concepts and expanded on a few decision points that are useful to the reader while doing battle with the code and its bit rot.
As per the original article’s introduction:
This tutorial will show PHP developers how to leverage Azure Active Directory to enable single sign-on for your own custom PHP applications. You will learn how to:
- Install and configure SimpleSAMLphp on to an IIS web server.
- Obtain and edit the necessary sample code associated with the original article.
- Create and configure a custom Azure application inside Azure AD.
- Protect the application (err, page) using WS-Federation.
- Demonstrate actual authentication with Azure AD as well as federated authentication with an on-premises domain via Azure AD.
Download the latest version of SimpleSAMLphp
- Navigate to https://simplesamlphp.org/.
- Download the latest version of SimpleSAMLphp.

Prepare your IIS server for and install SimpleSAMLphp
This section is more like instructing on best practice. The contents of the SimpleSAMLphp archive file shouldn’t be placed in a site’s root. The only part of SimpleSAMLphp that needs to be accessible from the Internet are the files located inside the www folder of the SimpleSAMLphp archive. As such, it is considered best practice to place the whole SimpleSAMLphp folder in a location one directory level above where you normally store your website root/site folders.
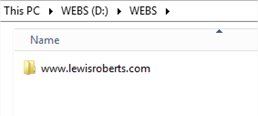
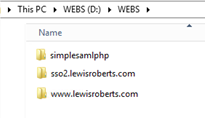
As an example; on my server I have a folder at D:\WEBS\ that I use to store all the websites I run on this server. Before I configure a new site, I create a folder inside D:\WEBS for the site and then create the site in IIS and point to this folder.
In the screenshot below, you can see the folder www.lewisroberts.com inside D:\WEBS
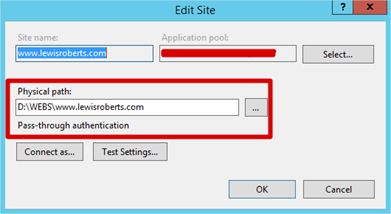
When I created the www.lewisroberts.com site in IIS, I point the Physical path setting to D:\WEBS\www.lewisroberts.com\ like so:
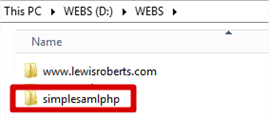
So, why am I telling you this? Because we are going to place the simplesamlphp folder inside D:\WEBS only. It will not have a site created for it in IIS and so, effectively, there is no way to get at this folder from the Internet. For now, put the extracted folder alongside your other site folders like I have done below.
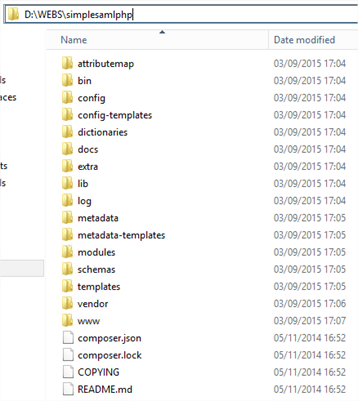
Inside the simplesamlphp folder we should see the following directories. Note that the www subfolder is still there. This will not be moved.
So how does the application/site code take advantage of SimpleSAMLphp if it can’t be accessed from the Internet and there’s no site associated with it in IIS? To do that, we will create a Virtual Directory within our site to expose only the necessary www folder from SimpleSAMLphp. We do of course still need a folder (for our own application’s code) and of course, a site created in IIS before we can add a Virtual Directory.
- Create a folder for the site. In this case I’m going to call my site sso2.lewisroberts.com so I create the new folder at D:\WEBS\sso2.lewisroberts.com
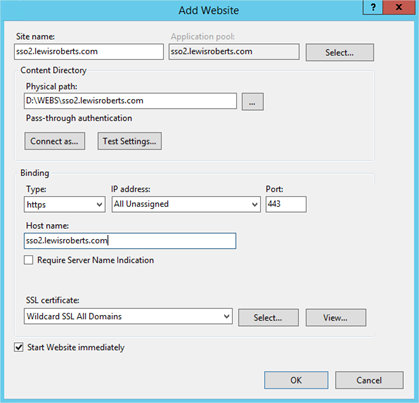
- Then I create the site in IIS, pointing its physical path to the sso2.lewisroberts.com folder I created in the previous step. Obviously you want it to be SSL secure so do the necessary with the bindings and select an appropriate SSL certificate.
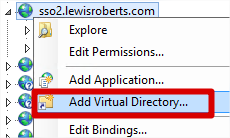
- Finally, in IIS Manager, right-click the sso2.lewisroberts.com site that was just created and click Add Virtual Directory.
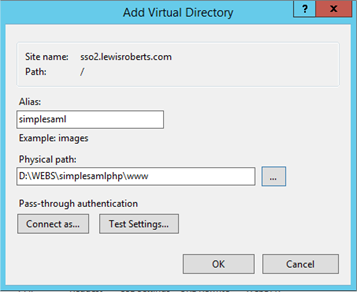
- Create a Virtual Directory (Alias) to point to the SimpleSAMLphp www folder.
This exposes the contents of the SimpleSAMLphp www folder as https://sso2.lewisroberts.com/simplesaml to the Internet.
ie. If we browse to https://sso2.lewisroberts.com/simplesaml we would get to see the SimpleSAMLphp app.
- After configuring the Virtual Directory, the structure should look like the following:

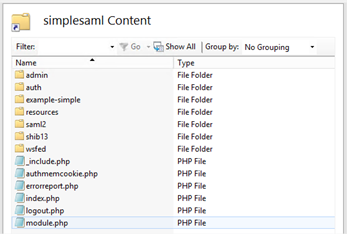
If you switch to the content view within IIS, you should see the following set of files. Compare these to the D:\WEBS\simplesamlphp\www folder and you’ll see they’re the same.
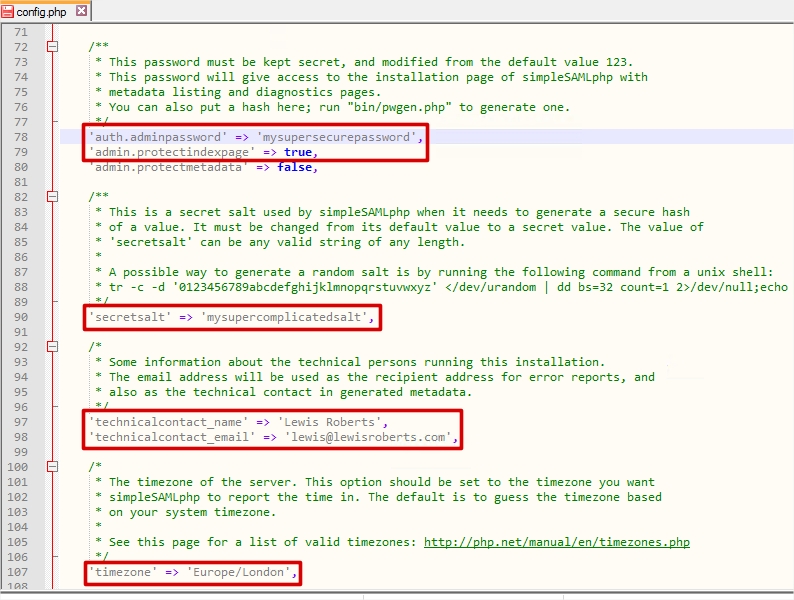
- Before we finish with SimpleSAMLphp, you should edit the configuration file and change the admin password, protect the index page, add a salt and technical contact information. Navigate to (for example) D:\WEBS\simplesamlphp\config\ and open config.php in your text editor (Notepad++ is your friend here) I’ve marked where these are so you have line numbers or words to search for.
Once you’ve protected the index page, don’t forget you’ll need to log in when you visit your simplesamlphp installation on the web.
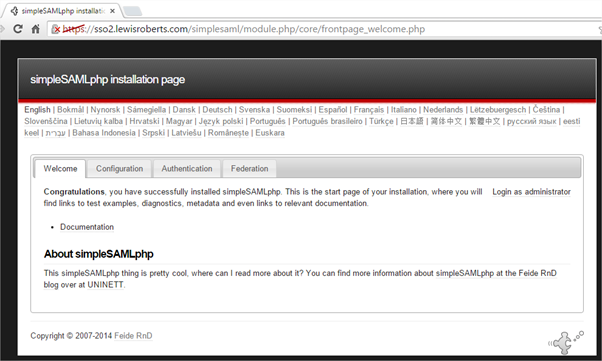
- Save that and you’re done with SimpleSAMLphp for now. If you like, you can browse to the simplesaml virtual directory of the site (https://sso2.lewisroberts.com/simplesaml). Once logged in, you should get something like this. Have a browse around.
Download the sample code for Azure Active Directory and single-sign-on for PHP websites and prepare it for use.
Update: 28/08/2016 – I’m aware that the sample code is no longer available, well, the original article isn’t so I assume the same code has also gone to the Recycle Bin. At this stage, I suggest reading through the remainder of this article (for the purposes of setting up the custom app in Azure AD) and instead use my second article in this series to complete configuration and integration using simpleSAMLphp instead of the custom code I discuss here. The original content is left for information…
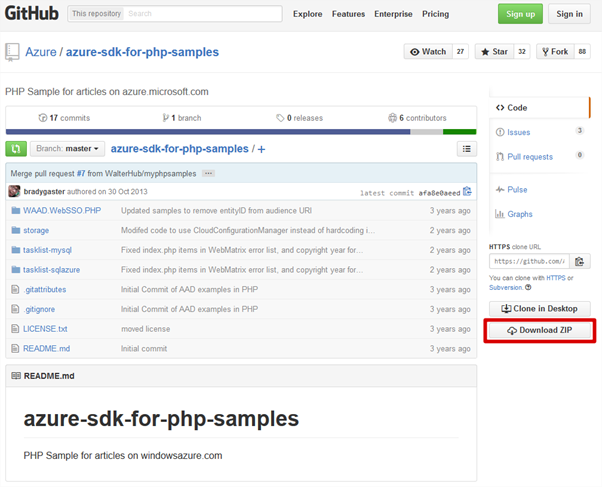
- Microsoft have provided some example code you can use to integrate your PHP applications with Azure AD which is available from: https://github.com/Azure/azure-sdk-for-php-samples
- Download the sample code as a zip file from GitHub.
- Extract the contents of the zip file to a folder on your workstation (there’s some editing to do before they go on the IIS server).
- Navigate to the <extracted zip location>\azure-sdk-for-php-samples-master\WAAD.WebSSO.PHP\php\code\libraries folder. There are two further folders beneath there called federation and waad-federation.

- Open the PHP files from each folder and remove the default Microsoft No warranty text. Remember to repeat this for all files in each of the two folders. There are a total of 9 files that require editing, 6 in federation, 3 in waad-federation.
Tip: I tend to use Notepad++ for these kinds of actions. I can select all files in a folder in one go, open them all up, make my edits, save and close.
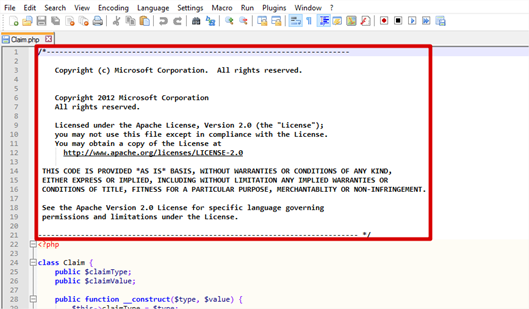
After editing, each file should start on its first line with <?php – no whitespace should be above this.

-
Open Saml2TokenValidator.php from the federation folder again.
- Remove all of the require_once declarations except for the Claim.php one located at the bottom. I’ve highlighted the ones to remove in the screenshot below.
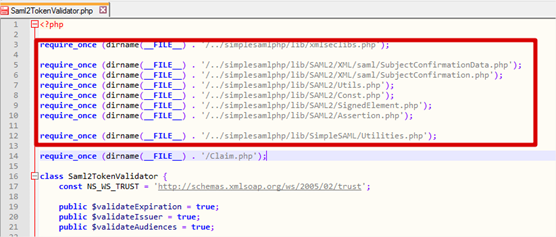
- Add the following declaration at the top of the file
require_once (dirname(__FILE__) . ‘/../../../simplesamlphp/lib/_autoload.php’);

Yes, this does use a lot of “go up a folder” instructions in the file location. If you’re confident you know what you’re doing, you can change this to just be the fully qualified location where simpleSAMLphp is located on your server.
- Remove all of the require_once declarations except for the Claim.php one located at the bottom. I’ve highlighted the ones to remove in the screenshot below.
- Now that the files have been edited, copy only the libraries folder and its subfolders/files in to the root of the sso2.lewisroberts.com site.

Back inside IIS, we should now see this folder structure.

Create an Azure application inside your Azure AD
- Navigate to manage.windowsazure.com, log in and navigate to the directory that you will use for authentication.
- Click the Applications tab and then click Add at the bottom.
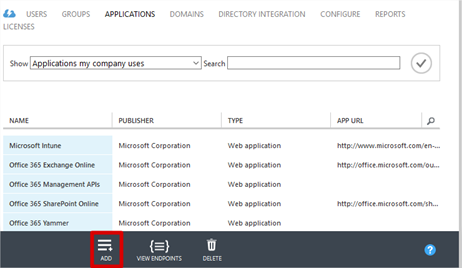
- Click Add an application my organization is developing.

- Give your application a name and select Web Application and/or Web API.
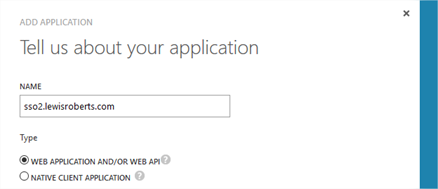
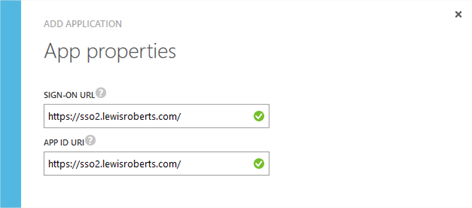
- Enter the Sign-on URL and an App ID URI. Don’t worry about these for now as they can be changed later.
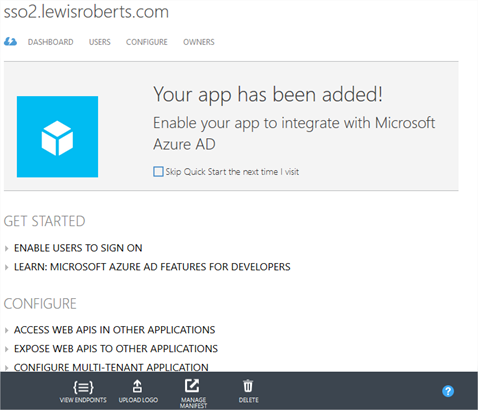
- Now that the app is created, click View Endpoints in the grey bar at the bottom of the browser.
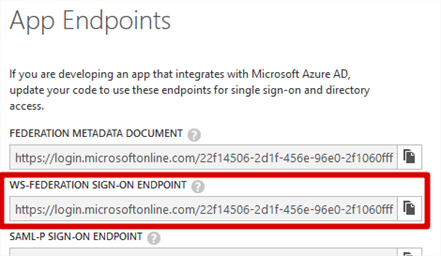
- Copy and record the WS-Federation Sign-On Endpoint. This will be required later.
- Click the Configure tab.

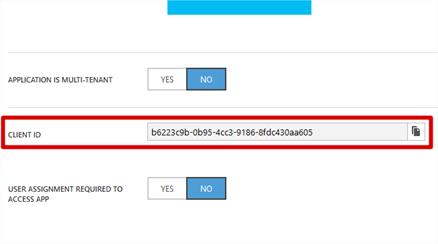
- Scroll to Client ID. Copy and record this value, it will be required later.
- Scroll a little further to Reply URL. No need to remember this, but I wanted you to see what corresponds to what when we use this information in the next section.

- There are a number of other options here but for now, that’s everything we need from the Azure portal.
Create a federation.ini configuration file
The federation.ini file is used by the sample code to know where to send the federation requests as well as specify a number of other bits of information required during authentication handling. Its structure is as follows:
|
1 2 3 4 5 6 |
federation.trustedissuers.issuer= federation.trustedissuers.thumbprint= federation.trustedissuers.friendlyname= federation.audienceuris= federation.realm= federation.reply= |
Why do we use a .ini file? Isn’t that a bit “old hat”?
Yes, it is and to be honest, the only logical reason I can think of why this is used instead of say, JSON is because, like a web.config file, it can’t be requested from an IIS server (unless you set up a mime type for it of course – don’t do that obviously). This ini file is parsed by the sample code using PHP’s parse_ini_file() method so, arguably, it can be changed if you’re feeling adventurous. I’ve chosen to keep it as close to the original article as possible so the ini file stays.
How do we complete the .ini file?
Using the information we recorded earlier, namely, the WS-Federation Sign-On Endpoint and Client ID plus some information we already know about our app.
Briefly:
|
1 2 3 4 5 6 |
federation.trustedissuers.issuer=WS-Federation Sign-On Endpoint federation.trustedissuers.thumbprint=Thumbprint of the X509 cert from the WS-Federation Sign-On Endpoint. federation.trustedissuers.friendlyname=Anything federation.audienceuris=spn:Client ID federation.realm=spn:Client ID federation.reply=Reply URL |
So, after swapping in all of the information we obtained during the last section and adding in the information we can choose ourselves, we should have a federation.ini file that looks as follows. Some of the lines have wrapped so I’ve added a screenshot also.
As per the original article: the audienceuris and realm values should be prefaced by spn:
|
1 2 3 4 5 6 |
federation.trustedissuers.issuer=https://login.microsoftonline.com/22f14506-2d1f-456e-96e0-2f1060fff330/wsfed federation.trustedissuers.thumbprint="get_this_in_a_moment" federation.trustedissuers.friendlyname=Azure federation.audienceuris=spn:b6223c9b-0b95-4cc3-9186-8fdc430aa605 federation.realm=spn:b6223c9b-0b95-4cc3-9186-8fdc430aa605 federation.reply=https://sso2.lewisroberts.com/ |

So what’s that federation.trustedissuers.thumbprint value all about? My understanding (that means I’m not absolutely certain but about 95% sure) is that this is the thumbprint of the X.509 certificate associated with the WS-Federation endpoint and as such, it will likely change for your implementation so, setting it as “get_this_in_a_moment” will force the application (library) to throw an error and it will actually tell us what it was expecting. So we’ll revisit the federation.ini at a later step in order to add this information but first, we need to get some other important files set up.
Now that we have our federation.ini file, copy it to the root of the site.

Create index.php
Create a file called index.php and add it to the root of the site.
Just as per the original article on which this blog post is based, create an index.php file and add the following code.
|
1 2 3 4 5 6 7 8 9 10 11 12 13 14 15 16 17 18 19 20 21 22 |
<?php require_once (dirname(__FILE__) . '/secureResource.php'); ?> <!DOCTYPE html> <html> <head> <meta http-equiv="Content-Type" content="text/html; charset=ISO-8859-1"> <title>Index Page</title> </head> <body> <h2>Index Page</h2> <h3>Welcome <strong><?php print_r($loginManager->getPrincipal()->getName()); ?></strong>!</h3> <h4>Claim list:</h4> <ul> <?php foreach ($loginManager->getClaims() as $claim) { print_r('<li>' . $claim->toString() . '</li>'); } ?> </ul> </body> </html> |
In a half decent text or code editor, this should look as follows.
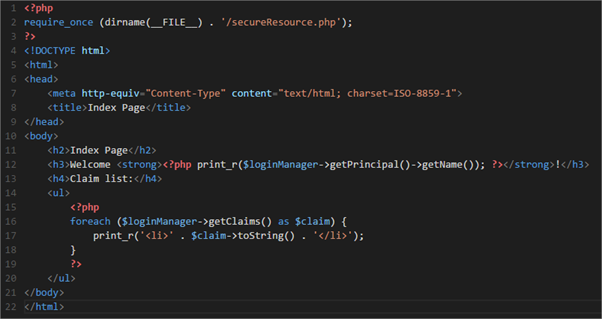
Now copy the index.php file to the site root.

Create the secureResource.php file
This file is called as a requirement on all PHP pages where you want to add authentication. If you look closely at index.php above, you’ll see secureResource.php is called under the first require_once declaration near the top of the file.
Create secureResource.php file and add the following code. Please be mindful of line wraps.
|
1 2 3 4 5 6 7 8 9 10 11 12 13 14 15 16 17 18 19 20 21 22 |
<?php ini_set('include_path', ini_get('include_path').';./libraries;'); require_once ('federation/FederatedLoginManager.php'); session_start(); $token = $_POST['wresult']; $loginManager = new FederatedLoginManager(); if (!$loginManager->isAuthenticated()) { if (isset ($token)) { try { $loginManager->authenticate($token); } catch (Exception $e) { print_r($e->getMessage()); } } else { $returnUrl = "https://" . $_SERVER['HTTP_HOST'] . $_SERVER['PHP_SELF']; header('Pragma: no-cache'); header('Cache-Control: no-cache, must-revalidate'); header("Location: " . FederatedLoginManager :: getFederatedLoginUrl($returnUrl), true, 302); exit(); } } ?> |
Again, in a decent code editor, you should have this:
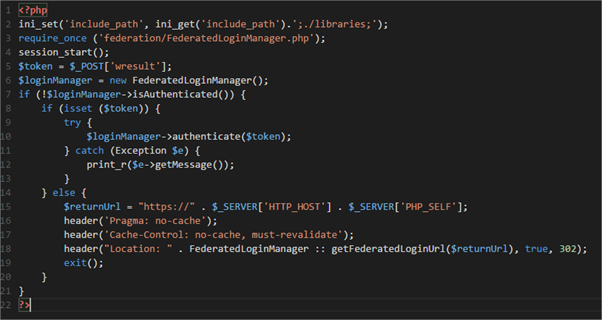
You’ll notice on line 2 of the secureResource.php file that we specify the location of the libraries folder. If you have placed yours somewhere other than the site root (contrary to this post), remember to change this value to reflect that. The code as shown above is accurate if you’ve been following along using the same locations as I have.
Open the application
Assuming all of the previous steps were followed correctly, when you visit the website, you should be redirected to log on with an Azure AD account (an account in the directory where your application was created!) and, once authenticated by Azure AD, redirected back to the application.
- Open your browser and navigate to your application’s URL.

- You should be redirected to the Azure AD logon page.
If you are not redirected, or you receive an error, review the PHP error log files. These are the best location to understand what is wrong. More often than not, it will be an error reading files because they aren’t where the code says they are. If you’ve followed along so far, these should be accurate, but do check for typos.
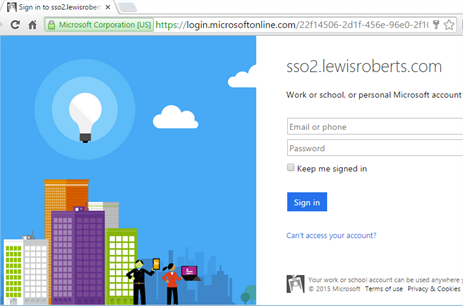
Note: Notice the URL in the browser – this is the federation.trustedissuers.issuer URL supplied in federation.ini. This is the location that differs completely from the original article on which this post is based. - Type in a username and password (that exists in the directory where the application was created) and click Sign in.
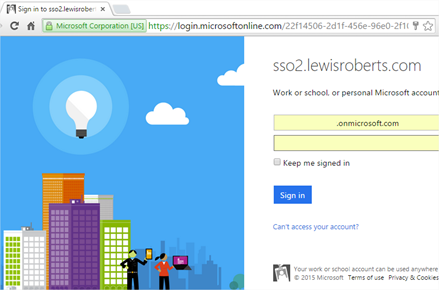
- Assuming the authentication works as it is expected, you should be sent back to the reply URL as specified in your application where, if all went well, you should see the index.php page but with an error.
If you recall, when we set up the federation.ini file, we did so without the thumbprint with the intention of forcing the application (library) to tell us what the thumbprint should be.
Here, the application tells us that the thumbprint should be 3270bf5597004df339a4e62224731b6bd82810a6, so let’s take that and insert it in to the federation.ini.

-
Open federation.ini with a text editor and change the thumbprint value to be the one obtained from the error page.123456federation.trustedissuers.issuer=https://login.microsoftonline.com/22f14506-2d1f-456e-96e0-2f1060fff330/wsfedfederation.trustedissuers.thumbprint=3270bf5597004df339a4e62224731b6bd82810a6federation.trustedissuers.friendlyname=Azurefederation.audienceuris=spn:b6223c9b-0b95-4cc3-9186-8fdc430aa605federation.realm=spn:b6223c9b-0b95-4cc3-9186-8fdc430aa605federation.reply=https://sso2.lewisroberts.com/

- Now re-attempt the authentication again and we should have a working application.
Federation
If like me you’ve configured federation between Azure AD and your on-premises AD, you can actually have AD authentication (via ADFS) too. It will even work with Multi-Factor Authentication if you have that configured. When you’re prompted for the username and password, provide a user account in the federated domain and you’ll be sent to the ADFS server (or Web Application/ADFS Proxy) on your premises where you log in to your own domain before being taken back up the authentication chain to Azure AD and then get handed off back to the application.
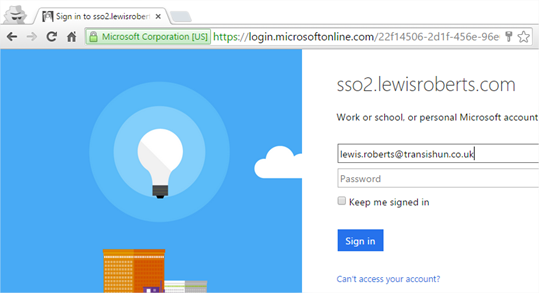
- As per the previous route, browse to the site and you’ll get redirected to Azure AD logon. Type in the user account from a federated domain. Here I’ve entered an account from a federated domain. Once I tab in to the password field, I’ll be taken to my ADFS server (actually Web Application Proxy)…
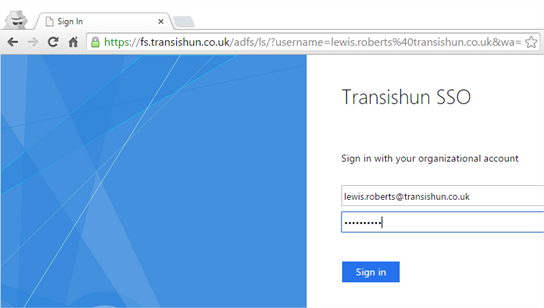
- Now I’m asked to log in at my ADFS server. I’m essentially logging in to my domain.
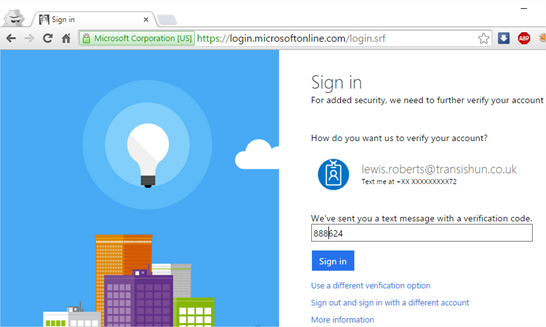
- I successfully logged in and was handed back to Azure AD logon but I have Multi-Factor Authentication enabled. You’ll notice that even if you have Multi-Factor Authentication (MFA) enabled, which I do on this account, the flow will work just as it does when signing in to Office 365 and I’ll be asked for my 2nd factor.
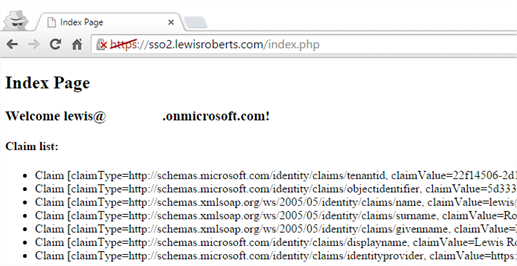
- Once you’ve authenticated properly you’ll get back to the site and you’ll be authenticated.

Hopefully that clears up a lot of the holes left by the original article and enables you to get to a working example. I don’t take any credit for the code of course, I just showed where to fix it and what parts of the original article to follow and which to ignore.
While on this journey of discovery and bug hunting, I also configured another web application which uses SimpleSAMLphp in a much more directly integrated way, actually using it as a Service Provider, giving you the ability to use a much better documented solution that has an API and is therefore likely to be far easier to code for. I’ll plan to get that written up soon in a follow up post.
Any feedback or issues or edits you think I should make? Let me know in the comments section below.
-Lewis





Great job.
I didn’t have time to figure out what was wrong with the original. This cleared things up.
Do you have an idea how to create a virtual host on MAMP ? Thanks in advance.
I’d expect it’s a matter of finding the config and making appropriate edits there. Not sure where that will be as I’ve never used MAMP but if you’re using the Apache server (instead of nginx) you’ll want something similar to this inside any like tags.
You’d create an Alias first, then set the directories attributes like this:
        Alias /myaliasdirectory /var/www/directorybeingaliased


                Options Indexes FollowSymLinks

                AllowOverride   AuthConfig

                Order allow,deny

                Allow from all
You’d then visit the alias by going to http://www.domain.com/myaliasdirectory for example.
HTH – Lewis
How to logout from it??
Rishabh, you’ll want to use the next post in this series instead. This post was more to assist people in using the example that was posted on the Azure site. That article has now been removed and as far as I’m aware there is no documentation available for the scripts used in this article. Use simpleSAMLphp instead, it has a much better API.
Hi Lewis,
I am trying to configure Azure AD as an IDP to SimpleSAMLPHP (SP), I have created an APP in Azure and configured all the URLs
Sign-On URL to Assertion Consumer Service URL
APP ID to MetaData EntityID
Reply URL to Assertion Consumer Service URL
When I click on the APP I created it redirects to my AssertionService URL after authenticating with https://login.microsoftonline.com/common/oauth2/authorize but on the return I do not see SAMLRESPONSE without it SIMPLESAMLPHP will not proceed further and it stops there.
Could you please let me know what I could be missing here.
Thanks
Balaji
Hi Lewis,
Thanks very much for the article, it’s a lifesaver! Quick question, this allows you to authenticate against one AAD, would it be easy to allow multiple AAD’s authenticate against the one site?
Thanks
Lee
Hi Lewis,
Thank you very much for your helpful article.
Would you please guide me, how to setup same things on XAMPP Apache server for single logon functionality.
Thanks
Manoj
Hi,
Thanks for all the info.
It’s working for me with an SSO2…. site.
I’m missing the point why you created two sites.
In this example you don’t use the http://www.lewisroberts.com site.
So why create that site?
Awesome worked like a charm! Thanks a million
Awesome worked like a charm but the thumbprint is getting changed, can you please help on this
Awesome worked like a charm but the thumbprint is getting changed. can you please help on this?