Getting started with Azure Active Directory Sync Part 2
Part 2: Getting started with Azure Active Directory Sync – Actually doing it
Part 1: Getting started with Azure Active Directory Sync – Tools
Part 3: Getting started with Azure Active Directory Sync – Mopping up
In order to do this part, I have to make certain assumptions about your environment. If this isn’t exactly true for you, sorry but hopefully you can adapt the information here to assist.
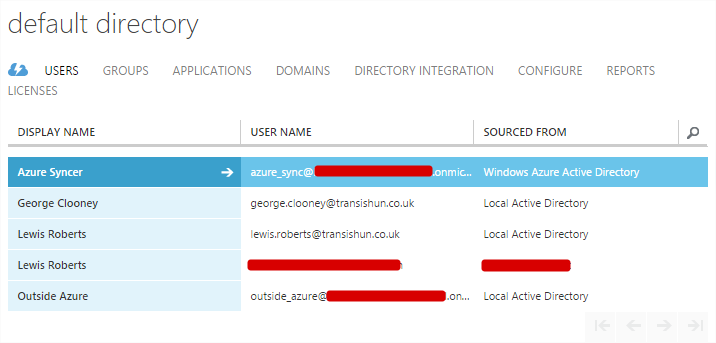
The PRIMARY assumption here is that you want your users to log on to Azure AD using their externally routable primary email address. This will be the same as the mail attribute of their on-premises AD user object. My on-premises AD users log in using a format like this: lroberts@transishun.local but their primary email address is lewis.roberts@transishun.co.uk. I want them to log in to Azure AD using their external email address. The screenshots below might explain this better.
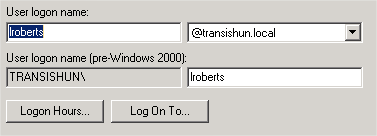
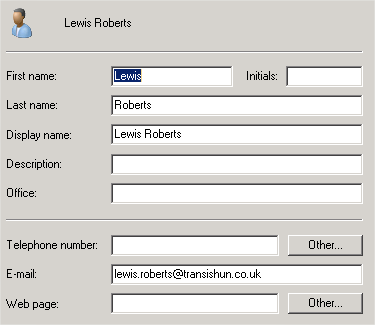
So, what if you don’t want to sync with the users’ primary email address and you’re happy to use the users’ normal username with the external domain? Well, the other option is to add a UPN suffix to your forest for the external domain but then users would need to log on to Azure AD using username@[thenewUPN] instead of using their, presumably more memorable, email address. You can add a new UPN in Active Directory Domains and Trusts – Google it. ;-). If I were adding a new UPN in the following examples, instead of using the mail attribute for Azure AD usernames, I would add the transishun.co.uk UPN in my on-premises AD and configure the Azure AD Sync Services program to use the UserPrincipalName attribute instead of mail. If this doesn’t make sense now, do the following steps in a test environment first then read my series addendum post.
Pre-requisites
- Your own internal Windows AD forest/domain. This is likely to be a .local or some other domain suffix that’s non resolvable externally. In this example, my internal Windows domain (and forest!) is transishun.local. I am running a single forest, single domain infrastructure.
- You, or someone you’re very friendly with, are a Domain Administrator in the Windows AD DS forest/domain.
- An Azure account with Global Administrator rights. Generally this means you can log in to and administer your Azure portal.
- An external routable, public domain that you are able to edit DNS entries for. In this example, mine is transishun.co.uk. It’s an actual website too if you’re bothered, some old music mixes I did about 10 years ago.
Add your external domain to Azure
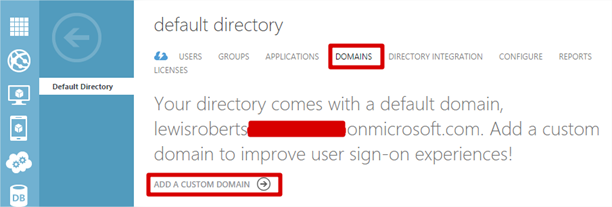
- Log in to your Azure Portal. I don’t like the new one, it never works. Navigate to all items, click the Default Directory then click Domains. Then click Add a custom domain.
- Enter in the domain name, without the www (that bit isn’t part of a domain!) and click Add.
If you will be using Multi-factor or Single sign-on authentication then this guide probably isn’t for you.
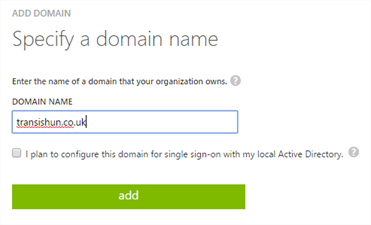
- Done. See, simple wasn’t it? Click the next arrow to verify the domain.

Verify the newly added domain
Now you verify that you own the external domain by creating a DNS record. For this purpose, you’ll need to log in to your domain registrar’s website, or contact the “hostmaster” who controls your domain name and ask them to make this change for you.
- On the Verify [domain.tld] page, use the link that Microsoft provide for you so you know what to do for your specific domain registrar.
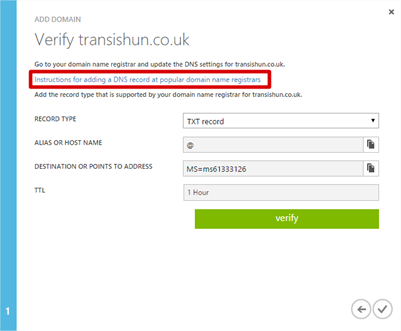
- There’s not much else I can help you with here but I suggest you create the record with your domain registrar first then click Verify (obviously) or it’ll fail. Once you’ve added the record successfully, you should get this.

- Clicking the tick icon sends you back to the domains page on the Azure portal where your external domain will be both added and marked as verified.

Set the Primary Domain
Here you need to configure the newly added domain as the primary domain.
- Navigate to the domains tab. Our default domain is currently set as the primary.

- Click the Change Primary button at the bottom then, assuming you only have the other domain to change to, click OK.
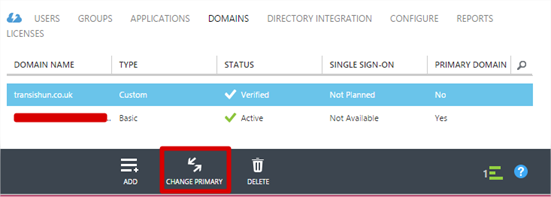
- To see the change reflected, you’ll need to switch to another tab and back.

Enable Directory Sync
Before you’ll be able to sync with Azure AD, you need to enable the option.
- In Default Directory, click Directory Integration then click Activated and finally, Save.
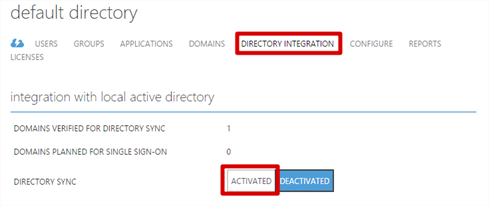
- You’ll get a warning, click the option you feel appropriate. That’d be Yes then.

- Nice little “working graphic”…

- Finally if it all went fine, the slider will have changed to Activated.

Create an Azure Global Administrator Account
This account will be used to perform the TO Azure AD sync (don’t worry, this whole process will only do inbound (TO Azure), you can’t accidentally configure it to do it back to your AD if you follow my instructions…and mainly because you probably aren’t using Azure AD Premium). You’ll specify this account later when we start to do our on premises bit and install Azure AD Sync Services.
- Still in Azure portal Default Directory, click the Users tab then click Add User.
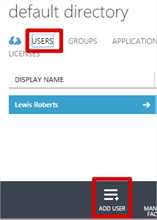
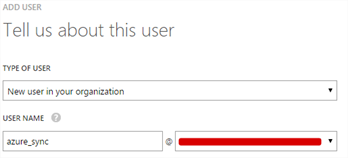
- Create a “New user in your organisation“. Call it whatever you like but I’d choose something sensible. The domain should be your standard Azure AD domain, not the external domain you added. In other words, I haven’t selected transishun.co.uk.
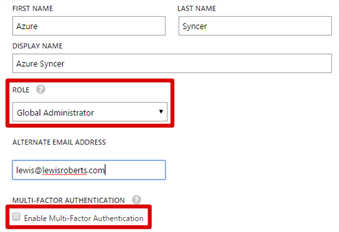
- On the user profile page, select the Global Administrator role and DO NOT check Enable Multi-Factor Authentication. You will need to provide an alternative email address, ideally a shared mailbox or off-network email address.
- Clicking next then create will give you a temporary password for this user. Note it and the username down. We’ll log in with this in a minute in order to change the password to something more secure.

- The new user is dropped in to the users tab. You can, if you wish, click the user and set their Usage Location.

- Open another browser window using InPrivate, Incognito etc. to avoid messing with the existing portal log in and navigate to http://manage.windowsazure.com/
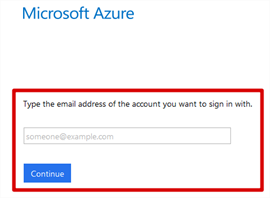
- Attempt to log in and you’ll be prompted to change the password.
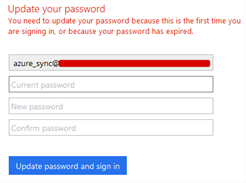
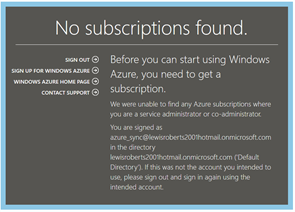
- Once logged in, you’ll get this. Don’t worry, just close the browser. All we wanted to do was set our own password for our azure_sync account. We’re all done in the cloud.
Create a Domain Administrator account in your on-premises Active Directory
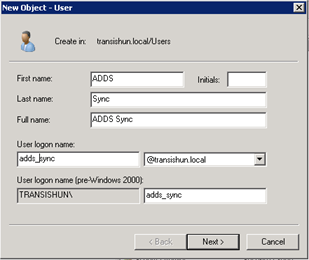
We’ll use this account when configuring the Azure AD Sync Services program shortly. It must be a domain administrator because the installation routine will create a number of user and group objects in the directory during installation. I’ve wondered if this account can be deleted, or at least turned back in to a normal account, once the installation is complete but I haven’t had use of Azure AD Sync Services long enough to tell you if it will break if you do that.
- Create a user. Yes, I’m doing this on 2008R2 but it won’t matter what domain and forest levels you’re at. 2012 will be fine.
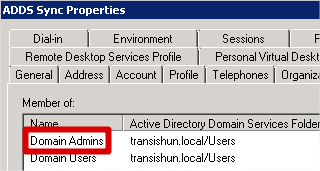
- Add the user to the Domain Admins group.
Install Microsoft Azure AD Sync Services
In this section we will install and configure the AD Sync services tool. We’ll tell the sync tool what users (OUs or containers) to sync users and groups from after this.
Update: August 2015 – Microsoft recently released Azure AD Connect which is the successor to Azure Active Directory Sync Services. While everything you’ve completed up to this stage is still required for you to integrate your on-premises domain with Azure AD, you should us Azure AD Connect instead of Azure Active Directory Sync Services. The underlying software is very similar to Azure Active Directory Sync Services but use the information provided here to supplement the installation process for Azure AD Connect.
- If you haven’t got it already, download Microsoft Azure Active Directory Sync Services from http://www.microsoft.com/en-gb/download/details.aspx?id=44225

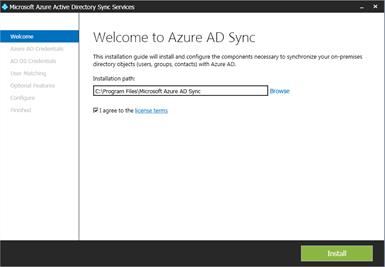
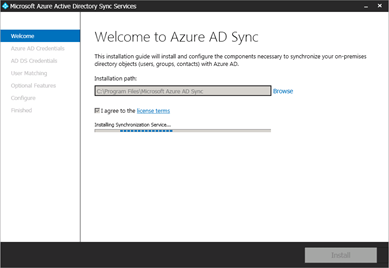
- Once you have it, run it on the server that will perform your synchronisation. Once executed, the installation routine will drop a few files on the server such as SQL Express install files.

- Choose where you want to install and click Install.
Don’t worry, nothing will do anything until you’ve configured several more bits of information. Interestingly, one of the pieces of software it installs is the Azure Active Directory Sign-In Client.
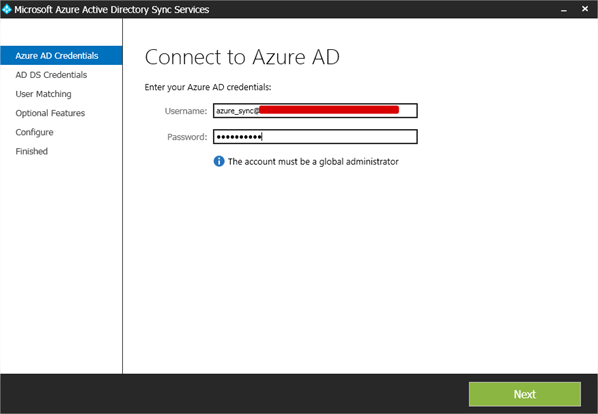
- Once installed, you’ll see the Connect to Azure AD page asking for credentials. Here you want to provide the azure_sync@ account that we created in the Azure portal earlier. This is why it must be created with the Global Administrator role.
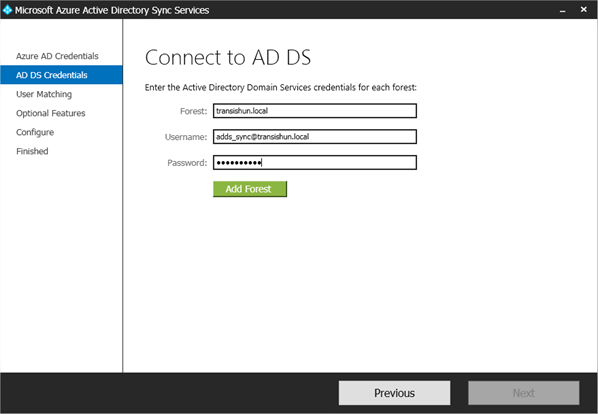
- Once logged on to Azure successfully, you’ll be taken to the Connect to AD DS page.
Enter the details of the on-premises Domain Administrator account you created earlier. In our example it’s adds_sync@transishun.local. You can also use the TRANSISHUN\adds_sync type NetBIOS format if you wish.
Click Add Forest.
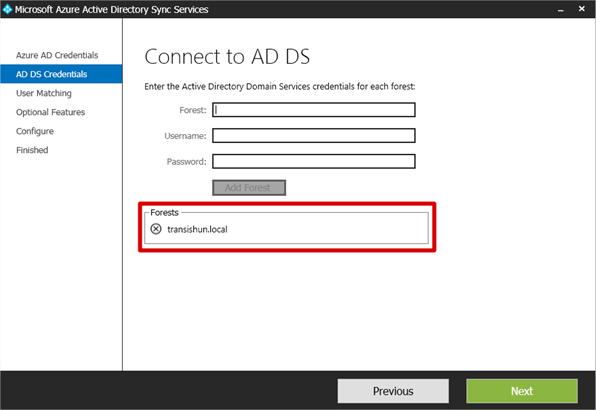
- You are shown that the forest details you entered are added to the list. You can add additional forests if you wish but this instructional doesn’t cover that.
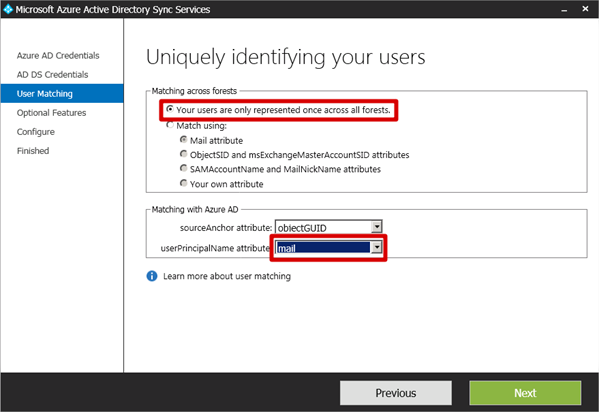
- WARNING: On the uniquely identifying your users page, be careful what you select. There are a number of options that are obviously too vast for me to discuss in detail. Remember when I said I’d made an assumption about the username format that you want your users to log in with? Here’s where I’ll make that configuration by selecting the mail attribute as the userPrincipalName under Azure matching.
- Firstly, I’ve only got a single forest, single domain and I don’t plan on moving users between forests any time soon, so I’m OK to select the default Your users are only represented once across all forests option in the Matching across forests section.
In the Matching with Azure AD section, leave the default sourceAnchor attribute of ObjectGUID selected. This is how the sync tool identifies who is who in each of the different directories.
Finally, the userPrincipalName attribute should be set as mail since this is the attribute we want to use to create user objects in our Azure Active Directory.NB: If you went to the trouble (*cough*) of adding a new UPN suffix and setting it as primary for your users, the userPrincipalName attribute would be left to its default of userPrincipalName. Remember though that this means the users would need to log on to Azure AD using their usual on-premises username and external domain UPN suffix. lroberts@transishun.co.uk in this example but that isn’t what we want here. I’ve added some more information about this UPN suffix decision in my addendum post.
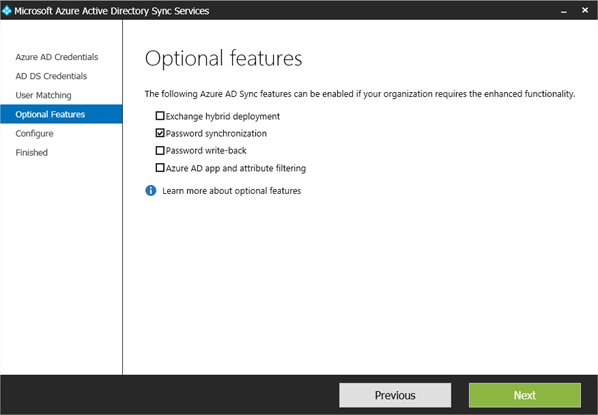
- Once you’ve clicked Next, you’ll get the Optional features page. Clearly we want to use Password Synchronisation so select that option. I believe Password write-back requires Azure AD Premium but for this exercise, we aren’t going to enable it, so leave it unchecked. Click Next.
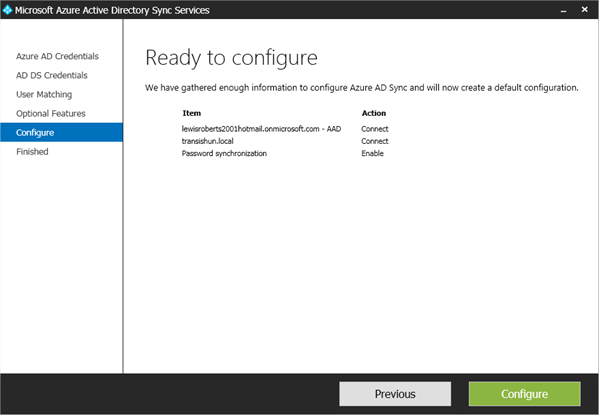
- On the Ready to configure page, review your options and click Configure. No synchronisation will take place yet so don’t worry.
NB: A consideration is that once you’ve clicked Configure, that’s basically all you can do with this tool. You can’t revisit this application and reconfigure by running through the wizard again. The only option is, I’m afraid, to turn off Directory Integration in the Azure Portal, delete the users and groups, uninstall Azure AD sync services (this app) and start all over again.
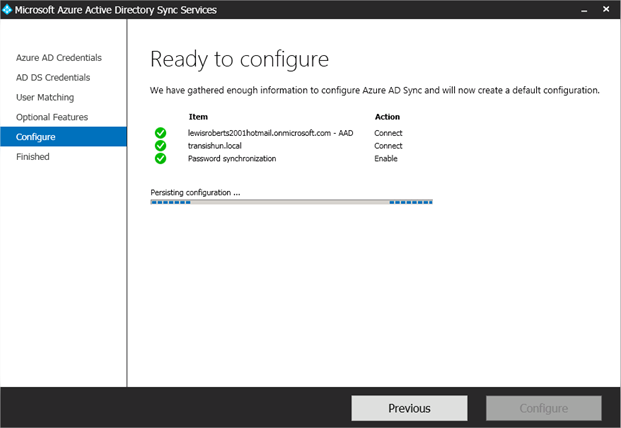
- As the tool configures everything, it will update and give you nice icons showing you progress.
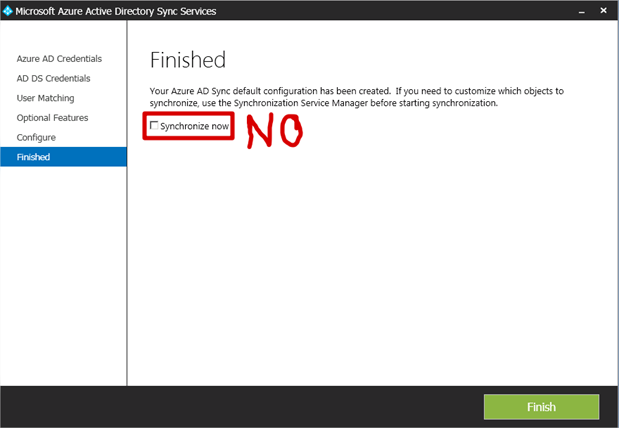
- WARNING. Once the configuration is complete, you’re given the option to Synchronize now. Unless you REALLY REALLY, (REALLY?!) want to synchronise absolutely every user and group in your entire on-premises Active Directory to Azure AD, PLEASE PLEASE (PLEASE!!)
uncheck
Synchronise now. Once you have unchecked Synchronise now, click Finish.
NB: A scheduled sync has been created (but is disabled initially), so move on to the next section to select what you want to sync before enabling the scheduled task.
Selecting who/what gets an Azure AD account
Here you’ll tell the sync tool which OUs and containers in Active Directory you want to sync to the Azure AD instance. If you haven’t logged off like you were told, do it now or the application to do this won’t start.
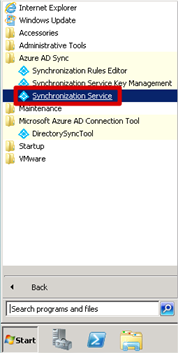
- Click Start and open Synchronization Service.
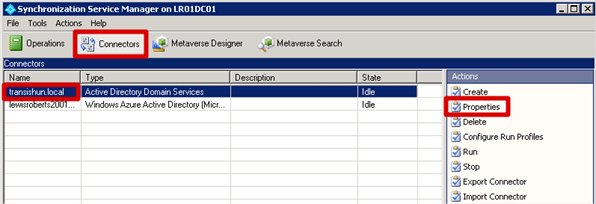
- Once Synchronisation Manager starts, click Connectors, select your on-premises domain from the list and click Properties.
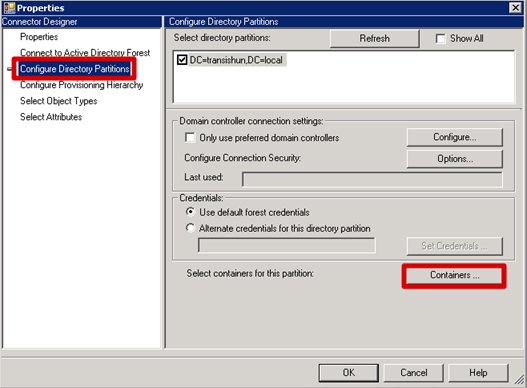
- On the Properties page, click Configure Directory Partitions then click the Containers button.
- Log in with the adds_sync@transishun.local account (the on-premises Domain Admin account).
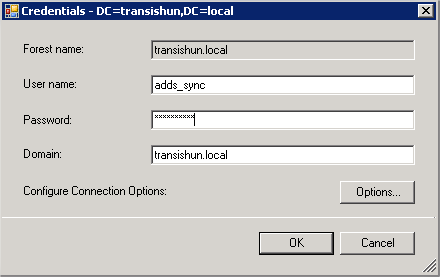
- The default is for everything (srsly?!) to be selected so uncheck the top level.
You can of course select the containers that you do want to be synchronised before clicking OK. I’ve selected my Azure OU.
NB: It’s presumptuous of Microsoft to assume that the users you want are all in easy to identify OUs in your on-premises AD. It would be a lot easier to synchronise members of a group to create as users but alas, I don’t know how to do this, yet. This, at least is something we can re-visit and re-configure.
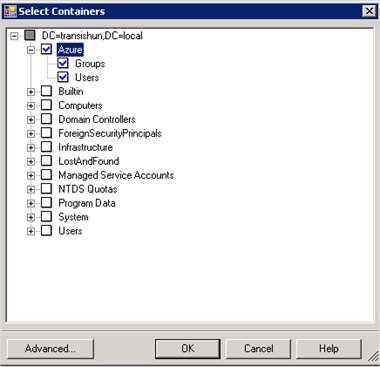
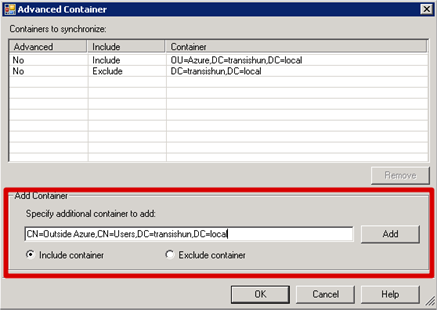
- If you click on Advanced, you can see that the list contains the inclusions and exclusions I’ve specified.
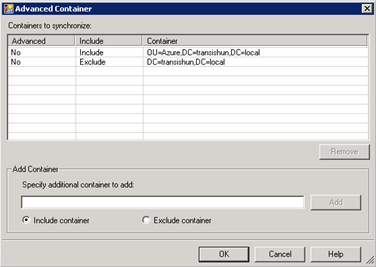
- You can also be quite specific about which groups or users to add by specifying the exact container name of a user or group to include in the sync. Just grab the container name (which is just a distinguished name) from the users’ attribute editor. As you can see, I’ve created this user outside of the OU that I’ve selected in the tree. I’ll just copy their distinguishedName attribute from my on-premises AD and…
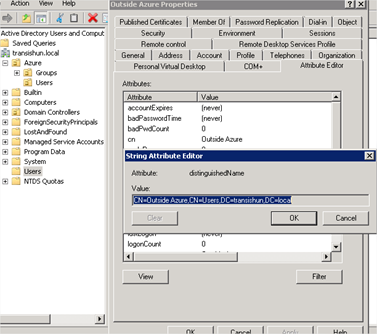
- …paste it in the Add Container field and click Add.
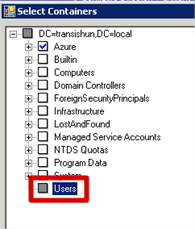
- Returning to the tree level, you can see a partial selected (grey) check box next to the parent container that my specifically selected user is in.
Let’s sync!
Now, let’s perform an initial sync and check we’re getting what we want, where we want it. If you really, seriously have left everything selected, please at least re-consider before you run this initial sync. It is easier to clear up two accounts and start afresh than 1500!
- Open PowerShell.
- Change Directory to “C:\Program Files\Microsoft Azure AD Sync\Bin”

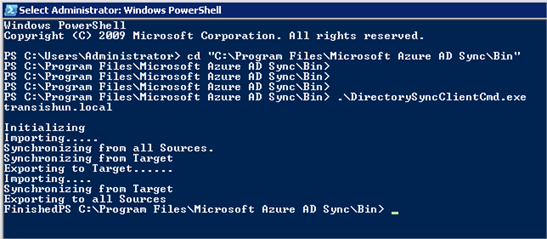
- Execute (use tab-completion!) DirectorySyncClientCmd.exe – (the .\ are important in PowerShell)

- These are the messages you can expect to get back from running the command, how long it takes is dependent on how many users you’re syncing. I’m doing three so it took about a minute.
- Before the sync we only had two accounts in our Azure AD. The one we usually log in with and our azure_sync account.
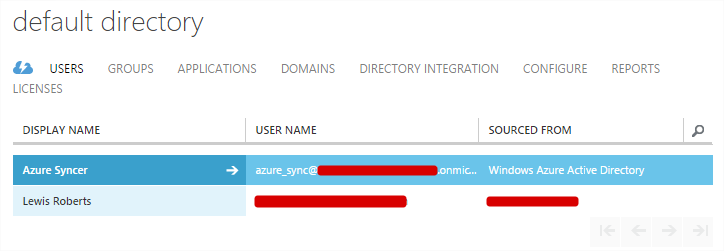
- After the sync completes and assuming there are no catastrophic network issues preventing it from happening, we should have all the on-premises users in Azure AD and they all have the correct username details.…but…. Hmm, looks like that account we specifically added from outside of the Azure OU didn’t have a primary mail address attribute, so it has been created using the default onmicrosoft.com address associated with our Azure AD. Damn! We’ll fix that in the next, much shorter post but for now, we should be syncing.
NB: I left that account in as an example of how testing using a small set of users makes the most sense to ensure you have everything correct. It’s easier to fix/update 1 account manually than 1000 that this could happen to.
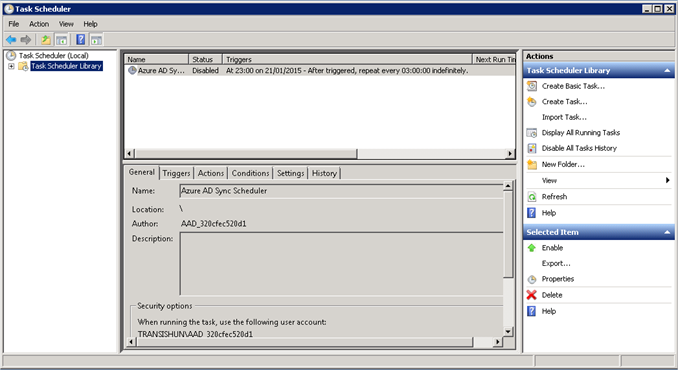
- Synchronisations will occur on a schedule which is created for you BUT NOT ALTERABLE in Scheduled Tasks. Enable this task to perform sync at the interval specified in the schedule (every 3 hours by default).
Why can’t I alter it? Primarily because you won’t know the password of the user that was configured to run the schedule. You could reset it but clearly Microsoft do it like that to prevent overuse from admins that want to sync every 10 minutes.
Hopefully that’s a suitable enough intro to Azure AD Sync. We’ll come back to the Outside Azure user account that was configured with the wrong UPN in a follow up post.
-Lewis




What if i accidentially synced the whole AD and didn’t want to. It doesn’t seem to remove the accounts again if i edit the containers later.
I’m sure you’ve worked it out by now but your best approach in this scenario is to just remove all users. If you de-select the containers, the user objects should become abandoned and take on the onmicrosoft.com UPN. I haven’t seen this with my own eyes though so it’s a guess. My opinion, remove the users from Azure and start the sync again.
Great article!
I am currently having issues with AAD Premium and Self Service password reset – getting an temporary connectivity error inside the browser! AAD premium licences are applied and all other pre-reqs as well! No errors in the on prem logs! I have no idea whats the issue here! Any ideas? Thank you!